• Trill
  • Craft prototype not working


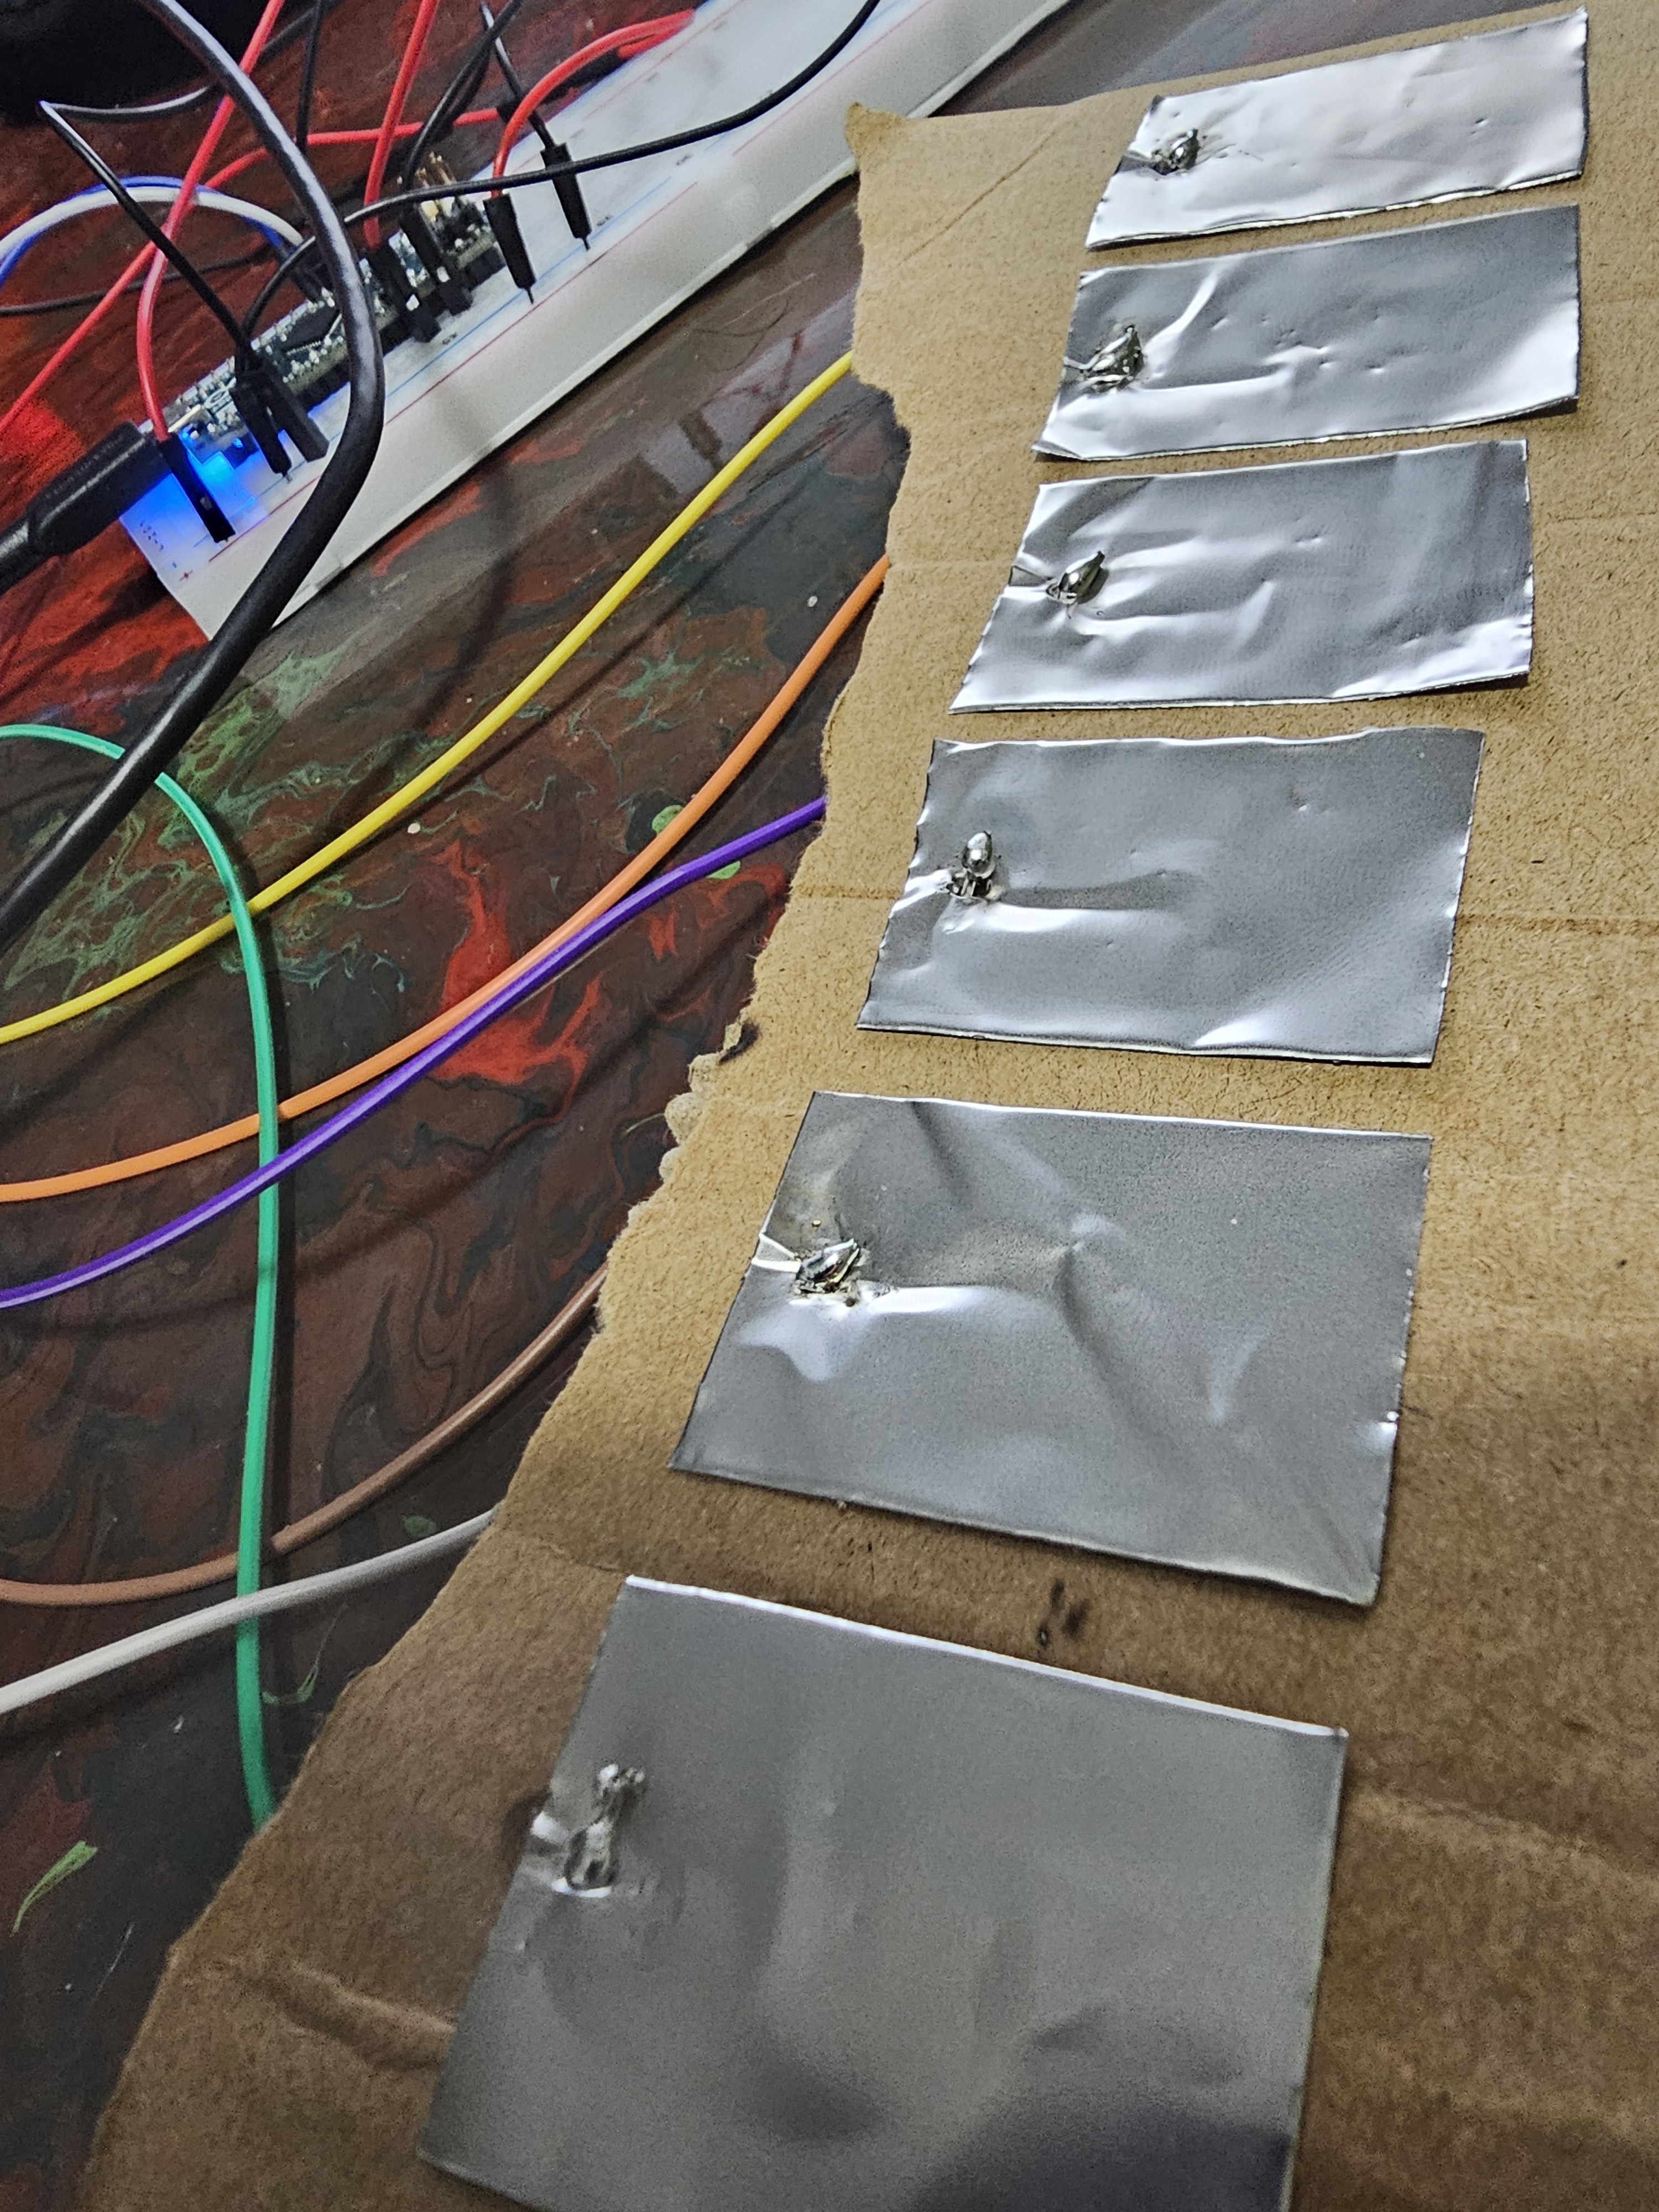
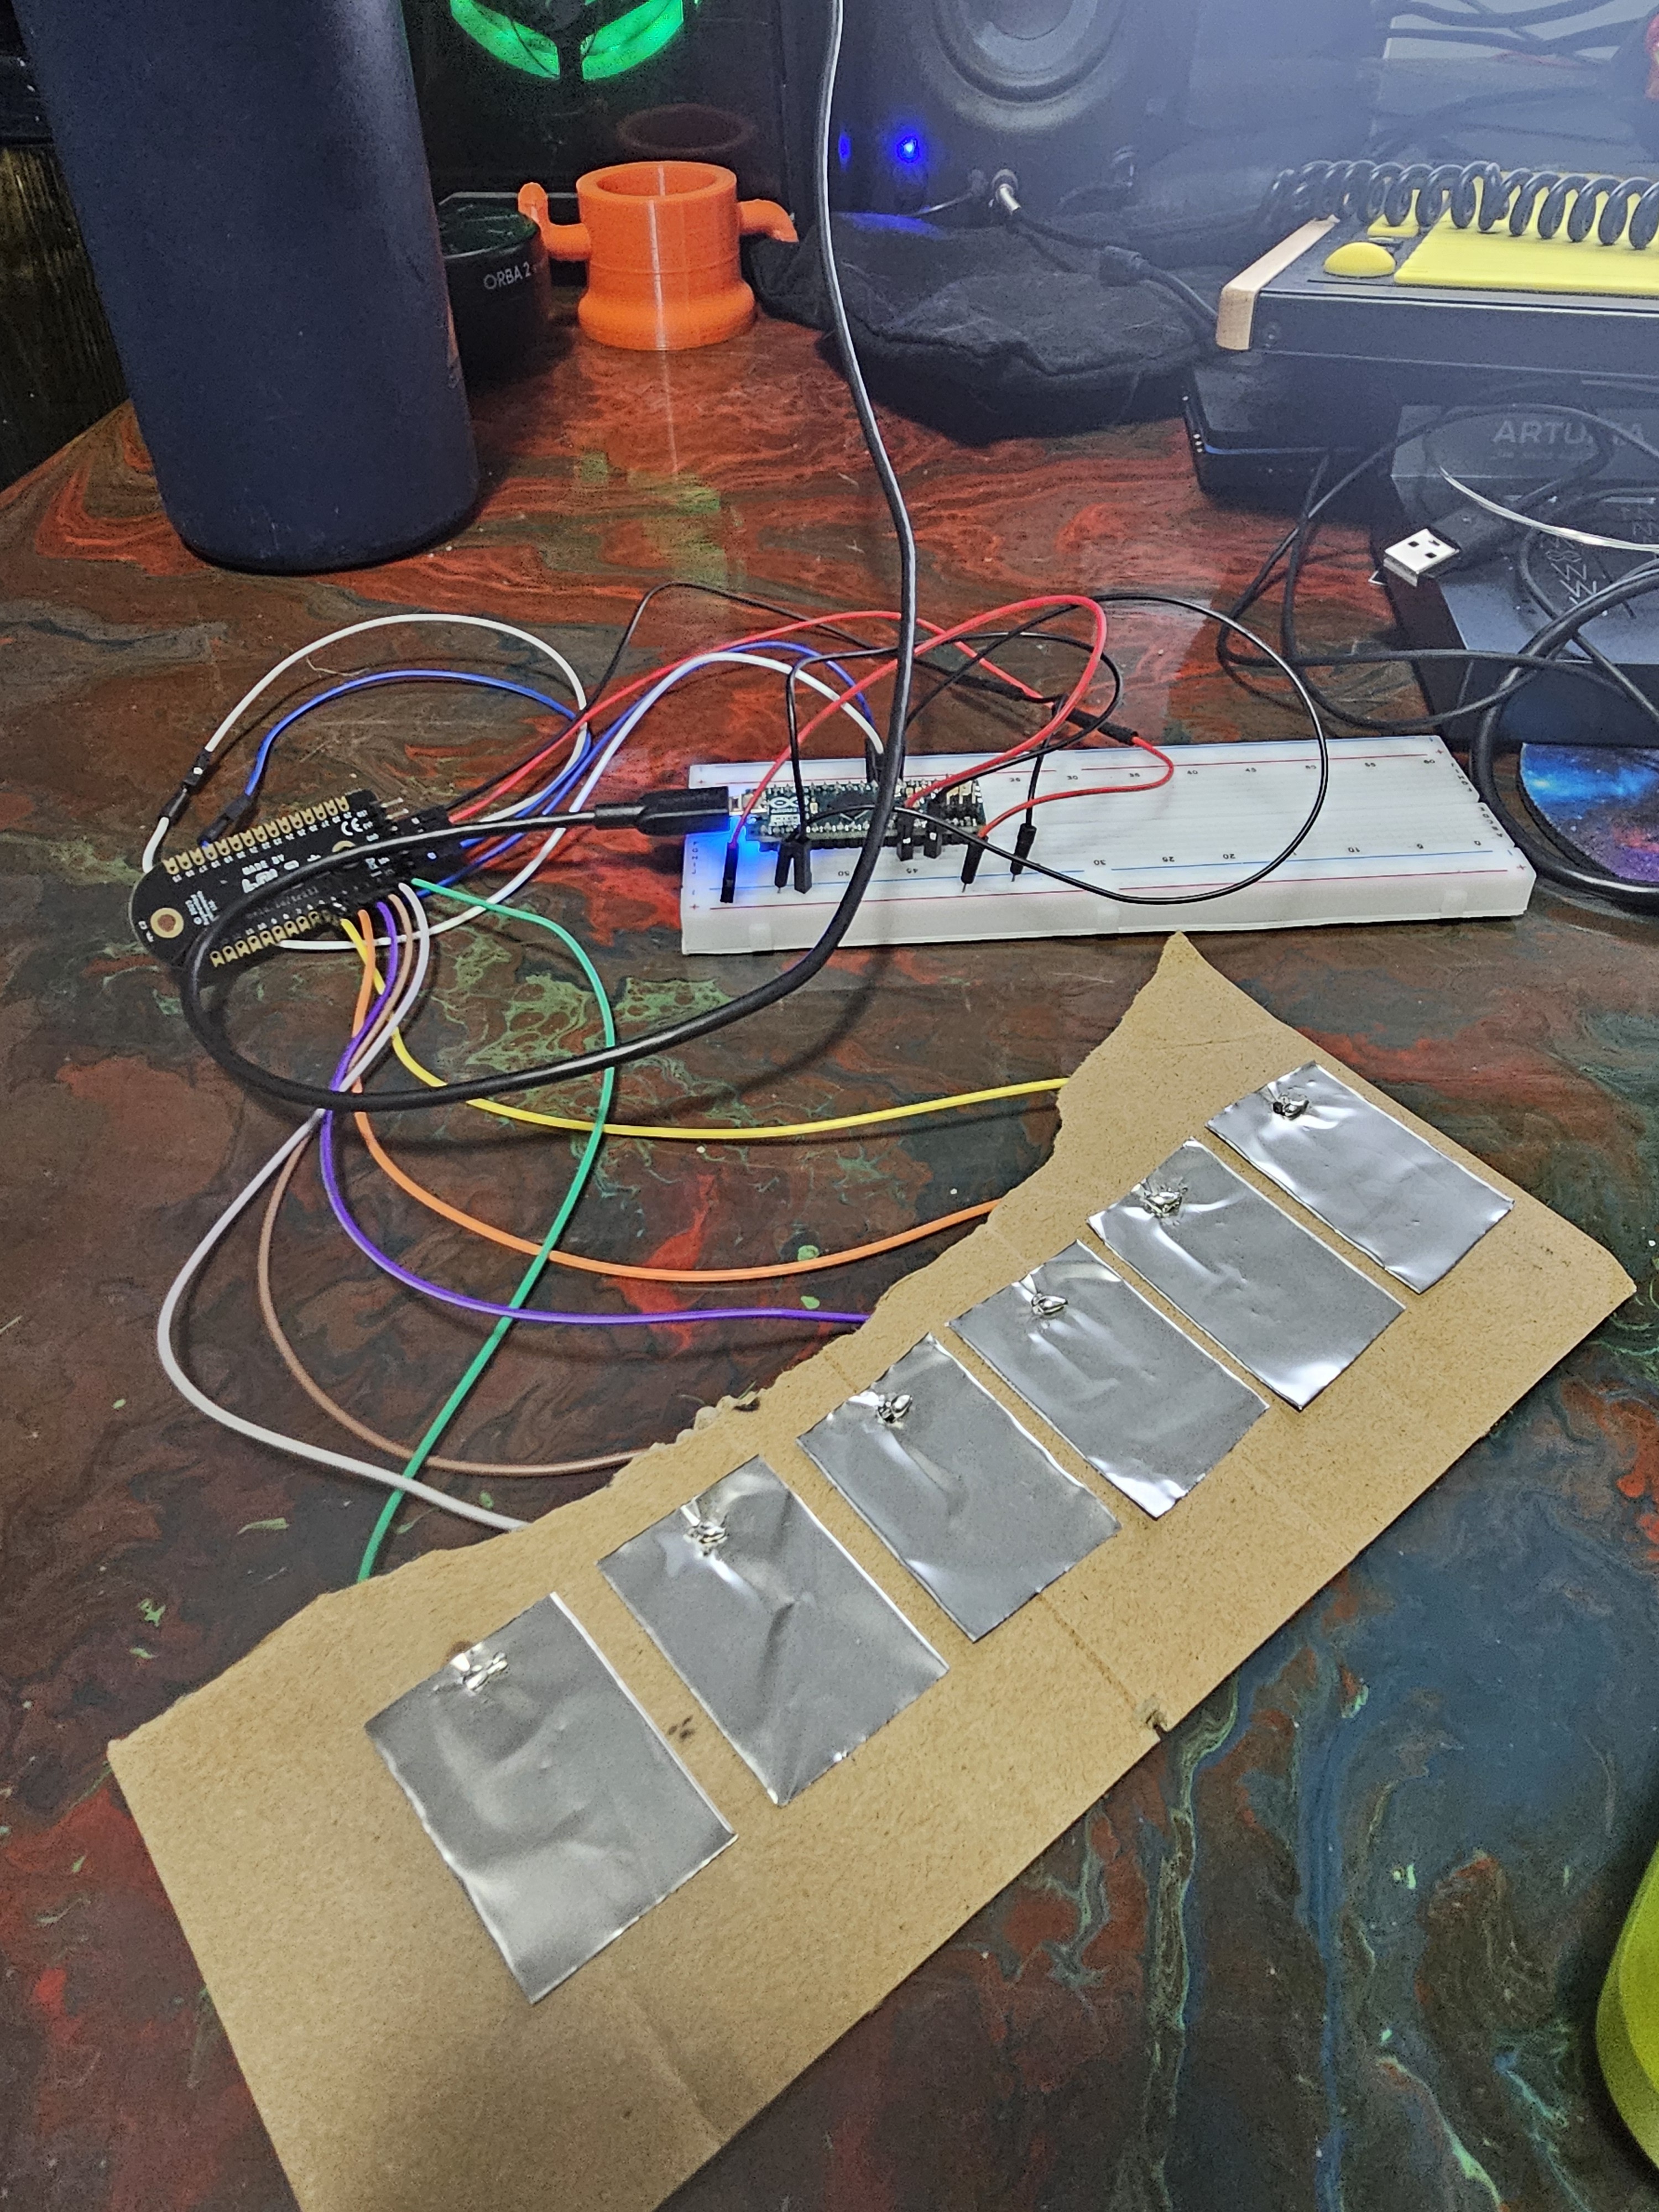
Very rough prototype, using arduino micro, the "keys" I found out later were non conductive so I only placed one connection to steel conductive tape. The orange wire goes nowhere yet, brown goes to the stainless steel tape, red to positive, black to gnd, blue is scl, white is sda, they do have a jumper cable to separate channel that then has a resistor put to another jumper of the 5v. I am trying to make a simple keyboard that does x pos and or y pos, I dont know coding so was using chat gpt to do it and is mainly just a prototype to see if cgpt is capable before moving onto the next steps, however using the trill craft example didnt give me any readings which prompted me to get the following code (ide) from support after emailing them (havent responded back so now I am here)
void setup() {

  >              // put your setup code here, to run once:
  >              Serial.begin(115200);
  >              delay(4000); // wait for the UART to come up
  >              int ret = trillSensor.setup(Trill::TRILL_CRAFT);
  >              while(ret != 0) {
  >                      Serial.println("failed to initialise trillSensor");
  >                      Serial.print("Error code: ");
  >                      Serial.println(ret);
  >                      delay(1000);
  >              }
  >     }

Using this I got the failed to initialise trill sensor, error code 2.
I also tried taping a prong to a metal socket to see if conductive tape wasnt actually conductive but same code, not really sure where to go from here?

Tested a Trill Bar with the Arduino Micro. Works without pull up resistors. The Arduino Micro has the I2C pins on pin 2 (SDA) and 3 (SCL).

@datres see if you can replicate this wiring (for non-Craft users, you may have a blue wire instead of the white one if you have a more recent sensor than the one used here) and if it doesn't work then it's most likely an issue with your Trill.

@datres make sure your connections are good. The Micro on your picture sits very high on your breadboard, mine is flush. Press it down into the breadboard.
How is the Craft connected? I can't see it on your picture. Just poking a jumper wire through the holes will not give you a reliable connection. Solder it.

    max Yes they are with a jumper wire, however they are the female ends bc the craft come with the male type prongs, and yes I immediately noticed yours was more flush, I have headers with mine (one side is longer than the other though 🤔) but they are not soldered, I am using an elegoo kit for breadboard and such but I will get my multimeter out to test connections hopefully sometime this week to verify connections. Its a really rough prototype atm haha

    11 days later


    ok revisiting this, I pressed the arduino down more so its flush, checked continuity and voltage all is good, no shorts, however, nothing at all appears in serial monitor, every minute or so It is constantly connecting and disconnecting between com ports, I even did a blink sketch and did same thing! So Im pretty sure its the weird adapter cable Im using, Its the only micro usb I have that transfers data, the others dont, ordered a new one and should get it tomorrow, Ill look into it again tomorrow and hopefully have a better update!

    max I tested with new cable, It is still switching ports but only with this sketch, it does not do it with blink, dont have voltage across craft boards contact points, only on headers, so am gonna solder headers tonight to it, I do not have a great solder iron lol, but I will come back with results tonight. Was beginning to think the micro had a problem but am not so sure now 🤔

    max

    Ok so soldered, didnt get 5v(1.65v) on gnd and vcc pins of craft but continuity was there, micro kept shutting off, had 5v power tho, figured out it was a jumper wire that mustve snapped inside as it didnt have continuity between its ends, changed it and am starting to get 0000 as values unless I touch the pins which escalate the values! Wish I could experiment more but itll probably have to wait a week or two, Ill keep updating this one when I do thanks again everybody!

      datres am starting to get 0000 as values unless I touch the pins which escalate the values

      that to me sounds like it's working

        5 days later

        giuliomoro Yea however, now that I moved to a prototype, it does not want to work combining midiusb.h lol
        Ive checked continuity and voltage across these pads, I get a constant 4.96v on these pads, Im getting 5v at craft board, all wires are good, I soldered these to the craft board in hopes I can desolder later as this is mainly proof of concept. I also done a midiusb example which worked, (c note off and on every half second), did craft print which is effected by my new pads meaning it reads the different values, but combining code has unfortunately not worked out. Ive checked and both libraries and ide is up to date as well. Not really sure where to go from here lol, this is the new code I tried to have it run but it did not output midi. If theres some errors or suggestions, please let me know!

        #include <Trill.h>
        #include <MIDIUSB.h>
        
        Trill trillSensor; // for Trill Craft
        
        void noteOn(byte channel, byte pitch, byte velocity) {
          midiEventPacket_t noteOn = {0x09, 0x90 | channel, pitch, velocity};
          MidiUSB.sendMIDI(noteOn);
        }
        
        void noteOff(byte channel, byte pitch, byte velocity) {
          midiEventPacket_t noteOff = {0x08, 0x80 | channel, pitch, velocity};
          MidiUSB.sendMIDI(noteOff);
        }
        
        void setup() {
          Serial.begin(115200);
          int ret = trillSensor.setup(Trill::TRILL_CRAFT);
          if(ret != 0) {
            Serial.println("failed to initialise trillSensor");
            Serial.print("Error code: ");
            Serial.println(ret);
          }
        }
        
        void loop() {
          delay(100);
          trillSensor.read();
        
          for(unsigned int i = 0; i < trillSensor.getNumTouches(); i++) {
            // Get the touch size (y)
            float ySize = trillSensor.touchSize(i);
        
            // Print the touch size
            Serial.print("Touch #");
            Serial.print(i);
            Serial.print(": Size = ");
            Serial.println(ySize);
        
            // Send MIDI note
            int note = 60 + i; // 60 is MIDI note number for Middle C
            int velocity = ySize * 127;
            if(velocity > 10) { // Set a fixed threshold
              noteOn(0, note, velocity);
              delay(100);
              noteOff(0, note, velocity);
            }
          }
          MidiUSB.flush();
        }

          datres now that I moved to a prototype, it does not want to work combining midiusb.h lol

          It seems that you moved from an example that worked to a hodgepodge of code which includes midusb stuff as well as attempting to read "touches" from a Trill Craft that is set (by default) to differential mode (and therefore doesn't detect touches) with the read(), getNumTouches() and touchSize() calls which are meant for Trill sensors set to CENTROID mode and are meant for retrieving location and size of a touch on a 1D or 2D touch surface comprised of tens of touch pads. In your case you are connecting to individual pads on the Trill Craft, so you should stick to the requestRawData() / rawDataAvailable() / rawDataRead() functions, as you see them in all the Trill Craft examples.

          Do one small step at a time when moving from the initial example that worked and if something stops working at that step, check back what you did and if you can't figure it out, post here two copies of the code: one that works and one - with a minimal modification - that doesn't work.

          PS: when posting your code, enclose it between two lines each consisting of three backticks (```) so it gets formatted properly (I already amended your post above).

          got it to work finally, since this is in differential mode, does that mean I cant use an x mode (forget exactly what its called)? Wanted to make a keytar of sorts but keys being the x and y control as well as notes, similar to how a fsr screen can. I have a secondary idea to acheive something similar but may be overkill to use this board for it tbh. Here is the code I used, hopefully I did those tick marks right!

          #include <Trill.h>
          #include <MIDIUSB.h>
          
          Trill trillSensor; // for Trill Craft
          const int numPads = 6; // the number of pads you're using
          const int threshold = 20; // Increase the threshold value
          bool notePlaying[numPads] = {false}; // Keep track of whether each note is playing
          
          void noteOn(byte channel, byte pitch, byte velocity) {
            midiEventPacket_t noteOn = {0x09, 0x90 | channel, pitch, velocity};
            MidiUSB.sendMIDI(noteOn);
          }
          
          void noteOff(byte channel, byte pitch, byte velocity) {
            midiEventPacket_t noteOff = {0x08, 0x80 | channel, pitch, velocity};
            MidiUSB.sendMIDI(noteOff);
          }
          
          void setup() {
            Serial.begin(115200);
            int ret = trillSensor.setup(Trill::TRILL_CRAFT);
            if(ret != 0) {
              Serial.println("failed to initialise trillSensor");
              Serial.print("Error code: ");
              Serial.println(ret);
            }
          }
          
          void loop() {
            delay(100);
            trillSensor.requestRawData();
          
            for(int i = 0; i < numPads; i++) {
              if(trillSensor.rawDataAvailable() > 0) {
                int data = trillSensor.rawDataRead();
                int note = 60 + i; // 60 is MIDI note number for Middle C
                int velocity = data / 8; // Scale the raw data to a velocity value
                if(velocity > threshold && !notePlaying[i]) { // If a touch is detected and the note is not already playing
                  noteOn(0, note, velocity);
                  notePlaying[i] = true; // Mark the note as playing
                } else if(velocity <= threshold && notePlaying[i]) { // If the touch is released and the note is playing
                  noteOff(0, note, velocity);
                  notePlaying[i] = false; // Mark the note as not playing
                }
              }
            }
            MidiUSB.flush();
          }

          When posting your code, enclose it between two lines each consisting of three backticks (```) so it gets formatted properly. There's also a tool in the toolbox of the editor: enter the text, select it and press the </> symbol. Either method works.

          Craft gives you access to 30 sensing pads. In the most basic form these are used as individual contact pads, each of which has a single scalar value for capacitance. This is what you are doing right now.

          If you combine two or more of these pads together you can achieve more complex sensing surfaces. What you can see in a rendering of Trill Bar below, for instance:

          That's 26 pads placed adjacent one to the other. Their geometry allows to interpolate between them and detect finger position.

          If you want to make sliders out of Trill Craft you have largely speaking two possibilities:

          • try to recreate a similar geometry as that of Trill Bar above, perhaps using fewer pads per slider, making shorter sliders
          • there are some designs that use two sensor pad per slider of arbitrary length, making what I'd call a "V slider" e.g.:

            In principle you can detect the position by weighing the relative activation of the red vs gray pad. We haven't tried this but if you see at the design files for Plinky you'll see that's what they are using for their buttons on the faceplate: they are actually several vertical V sliders. This may mean that spatial resolution is not great, but it works well enough to identify distinct touch points.